Monday, November 29, 2010

Purchased

So these bad boys are my purchase for the day
off of Gilt!
{a discount website that is amazing!! JOIN today!}

Aren't they amazing?!!
Bird Salad Plates- $ 24, originally $40
Crown Dessert Plates- $24, originally $40
I am going to make these plates into
cake stands for Christmas gifts!
I'll let you know how they turn out...


And these wonderful serving platters...
The brown one is pedestaled!
Crown platter- $32, originally $55
Brown platter- $20, originally $32

DIY: Yarn Wreath


Here's what you need:
{all supplies were found at a craft store, Wal-Mart, and Target}

Wire Wreath Form {I used a 18in. form}
Ornaments
Yarn
Glue Gun
Styrofoam Balls

To make the yarn balls:
I used a variety of sizes of styrofoam balls.
The sizes I used are: 2 1/2 inch, 2 inch, 1 1/2 inch
Wrap the yarn around the styrofoam ball in various and alternating directions {just like making a real yarn ball} until all of the white sytrofoam is covered. When you're finished just tuck the end
of the sting underneath the yarn to secure it.
Making the wreath:
There are a couple of ways to do this.. you can evenly space out your large yarn ba
lls onto your wreath form and glue them one at a time. And then you can glue your smaller yarn balls and ornaments around your large yarn balls. I have done this on a few of my wreaths.

Or you can build the wreath one section at a time building upon each section as you go. I found that this leaves less 'wholes' and hides the wreath wire form from view. This method works better for me and I like the way it looks. I added the larger yarn balls and ornaments around the bas
e of the wreath form and then I filled the 'holes' with smaller yarn balls and smaller ornaments. Securing each by gluing them to one another and to the wreath form. While gluing the pieces together you'll want to hold them for 15-20 seconds to make sure they are secure before moving on. I also made sure that I alternated the colors.

I found that holding the wreath upright or hanging it on my door let me have a
good look at it and find the places where I needed extra pieces added.

Monday, November 22, 2010

Roger's Gardens

For Thanksgiving I came to Newport, CA
and one of my favorite spots
to stop at is at Roger's Gardens
and when I walked in this is what I witnessed...
Sunburst mirror heaven!

I LOVE these berries!

If you are ever in the area,
you need to make the stop! It will not
disappoint you!

Friday, November 19, 2010

A Cute Christmas Gift

I came upon this and thought it was such a
GREAT idea for Christmas gift!


Ingredients:

3 1/2 Cups of Sugar

2 1/4 Cups of Cocoa

1 Tablespoon of Table Salt

In a large bowl combine all ingredients; Whisk together well.
Funnel into an air tight container - How is that for quick and simple!

For individual hot chocolate servings:
Fill a microwavable mug with one cup of whole milk. Microwave on high for 30 seconds and stir. If needed, microwave at additional 15 second intervals, until desired temperature is reached. Add 2 tablespoons of cocoa mix, stir to dissolve, and top with homemade marshmallows.

For a larger batch of hot chocolate:
Warm the milk in a saucepan over medium-low heat; taking care not to let the milk boil as it warms. Stir in 2 tablespoons of mix for each cup of milk. Top with homemade marshmallows.
*The printable directions for the gift basket are below*

{Marshmallows}
Ingredients:

2 1/2 Tablespoons of Unflavored Gelatin {approximately 3 1/2 envelopes}

1/2 Cup of Cold Water

1 1/2 Cups of Sugar

1 Cup of Light Corn Syrup

1/4 Teaspoon Salt

1/2 Cup Water

2 Tablespoons of Pure Vanilla Extract

Confectioners' Sugar {10X Powdered Sugar}


Makes 40+ Large Marshmallows
Combine unflavored gelatin and 1/2 cup cold water into the mixing bowl of a stand mixer, let sit for 30 minutes. {This can also be prepared without a stand mixer - Just place ingredients into a large bowl and use an electric hand mixer}.
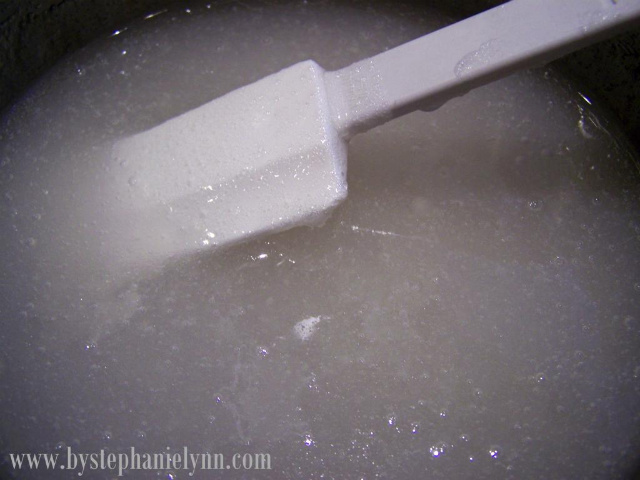
In a small saucepan, combine granulated sugar, corn syrup, salt and the additional 1/2 cup of water. Place over low heat, stirring constantly until the sugar has dissolved.
Increase the heat to high and boil mixture, without stirring, until it reaches 244°on a candy thermometer. {Approximately 12 minutes} Immediately remove pan from heat.
With a stand or hand-held mixer on low speed, slowly pour the syrup mixture into the gelatin.
Increase the speed to high and beat until the mixture is very thick, white and nearly tripled in volume. {Approximately 15 minutes} Add the vanilla and beat to incorporate.

Spray a glass baking pan with a light coat of non-stick baking spray and dust with confectioners' sugar. {my pan measured 13 X 9 X 2 1/2 inches} Pour marshmallow mixture into pan and sift a good layer of confectioners' sugar on top. Wet your hands and gently press on mixture, making sure it is even in the pan and somewhat smooth. Sift another generous coating of powdered sugar on top and place in fridge {uncovered} for at least 3 hours up to 24 hours, until firm.
Dust a large cutting board with confectioners' sugar. Run a butter knife around the edges of the pan and invert. You may need to use your fingertips to gently pull the marshmallow out.
With a serrated knife, trim off the rounded edges and begin to cut into squares. It helps to dust the knife before each cut with confectioners’' sugar. If the knife becomes sticky wash, dry and complete steps above. A clean dry knife helps keep the cuts precise and the marshmallows square. Toss the cut marshmallows with additional confectioners' sugar to fully coat; This will prevent them from sticking together. The marshmallows will keep for several weeks in an airtight container.

{Putting it All Together}
I repurposed glass spaghetti jars to hold the three ingredients for the gift basket. The labels were removed from the jars and they were thoroughly cleaned, sanitized and completely dried.

The tops of the lids {only} were sprayed with satin nickel spray paint covering any lettering or designs leaving a nice finished look.
All three jars were nestled in a wooden lath basket however, any woven basket or even gift bag will do. The jars contain the Hot Chocolate Mix, Handmade Marshmallows and Pepperidge Farm Creme Filled Pirouette Rolled Wafers {to use as stirring sticks}.
I made some labels for the tops of each jar as well as a 'direction' card for the hot chocolate. You can find the printable here. The images were simply printed on white cardstock and glued to the lids with a tiny bit of glue.
A big red bow was attached - as nothing dresses a present better than a big red bow.
Find it here
Thanks for the great idea!

Thursday, November 18, 2010

Hospital Visit

This is what I spent the later part of yesterday doing...
being in the HOSPITAL!
I hate being sick, and most of all, I hate throwing up!
It is the absolute worst, especially when it is
like every hour since 6:00 am.
(Along with my body doing other things
that don't seem natural!)

I felt like I was going to DIE!!!

Turns out I just have a bad case of the Flu
(so much for my flu shot)
or food poisoning!
(thanks del taco)

Monday, November 15, 2010

Lazy Mondays

This is so PERFECT!
I love this quote...
... It fits perfectly for some Mondays!
Find it HERE

Yarn Wrapped Letters

supplies you will need:
block letters
yarn
scissors

(these aren't really step-by-step directions, but more like tips and guidelines.)
1. begin wrapping the letter with the yarn. my recommendation is to wrap horizontally at first. (though really you can do it any way you want!) and unless you have to wrap a letter with a hole (Bs, Os, Qs, As, Ps, Ds, Rs, etc) you don't need to cut a particular length of yarn.
2. tackle the more difficult areas first (my ex: the middle part of the K). it doesn't have to look pretty in the beginning.
3. keep wrapping, and make sure the "uglies" (where you have to criss-cross to get to other parts of the letter) are on the back side.
4. make sure you cover every single bit of the letter, even the sides.
5. when you're done wrapping horizontally, start wrapping over that vertically. you don't have to, though, this is just how i do it. i learned that i like to wrap the letters in the direction that i would write them. does that make sense?
6. on the back, tie off your yarn (using some of the already wrapped yarn) and snip off the extra.


you're done!
now you can decorate with your masterpiece, add embellishments, use them as tools to help your child learn his ABCs, or whatever!

Find this wonderful project here!


DIY: Anthropologie Pennant Necklace

  • leather scraps (I found mine on clearance at the fabric store, but you could just as easily cut up an old purse or jacket or… pants? hee)
  • acrylic paint & paintbrush
  • necklace chain & jump rings
  • thin ribbon
  • scissors
  • a thick needle

Cut out several triangles from your leather. I ended up using 9 for this necklace.

This part was definitely an experiment. Being that I was using only supplies I had on hand at home & was trying to make this as cheap of a project as possible, acrylic paint was my only option. I’m no expert on paint, but I’m sure there’s another type that will last longer and hold up better. For now though, this works.

I poked teeny little holes in the flags with a needle, looped the jump rings through, and linked them all together side by side. About halfway through this process I thought to myself, “AHHH. Why didn’t I just glue this to the chain?”. It would’ve been a lot easier to assemble it that way, but I am no quitter. No siree.

Attach the necklace chain to both ends of the linked flags. Tie a sweet little ribbon to the chain and call it a day… you’re done, sista.

Find this HERE... such a CUTE blog


Monday, November 8, 2010

Target and Mercury Glass

Look at my find at TARGET!
Mercury glass and shimmery candles... does it get better?!

Go to your local Target store to get yours!
(This was not found in the holiday section, rather...
by the stationary and candles.)